Old Yharnam — Bloodborne
Old Yharnam — Exploration, Bloodborne. Explore the sourced guide, practical details and related entries. Free access.
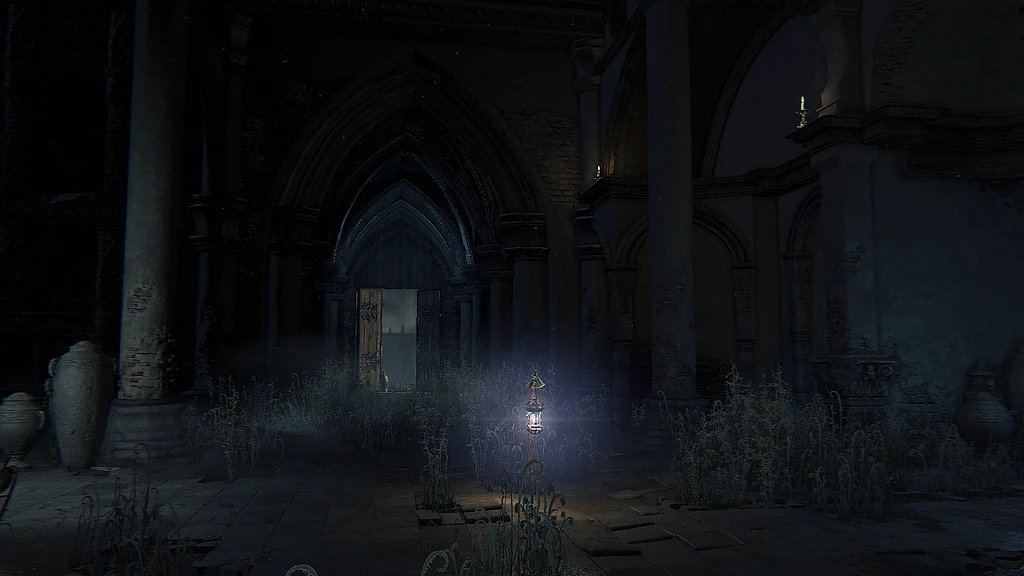
Finding your way around the region
Lamps and subareas:
- Old Yharnam
- Church of the Good Chalice
- Graveyard of the Darkbeast
Connected regions:
- Cathedral Ward
Prepare to explore
| Wiki recommendation | Value |
|---|---|
| Character level | 25 - 35 |
| Weapon upgrade level | +3 |
Key encounters
Boss : Blood-starved Beast · Darkbeast Paarl
Characters : Retired Hunter Djura
Insight : + 1 Encounter the Blood-starved Beast + 2 Defeat the Blood-starved Beast + 1 Encounter Darkbeast Paarl + 3 Defeat Darkbeast Paarl
Summons: locations and conditions
| Location | Condition |
|---|---|
| Old Hunter Alfred : Found in the courtyard right before the boss battle. His summon sign will be on the bottom of the stairs as you enter the courtyard. | You must have spoken to Alfred and agreed to cooperate with him. If you shift time into the Night, Alfred moves to his new position outside the Forbidden Woods , his summon signs disappear and won't be available for this boss fight. |
| Defector Antal : When you drop down onto the narrow fenced path leading to Darkbeast Paarl , take a right to reach this summon point. | You can only summon either Antal or Yamamura to assist you, not both simultaneously. |
| Yamamura the Wanderer Confederate : In plain sight along the path to the Graveyard of the Darkbeast after dropping from the cave exit. | In order to summon Yamamura for this fight, you must first kill him in the Hunter's Nightmare and equip the " Impurity " rune. You can summon either Yamamura or Antal to assist you in battle against Darkbeast Paarl , but not both simultaneously. |
Area Progression
- Get the Hunter's Torch from the Rooftops.
- Get the Rifle Spear from the Storage Area.
- Defeat Djura at the top of his tower to get the Powder Keg Badge, or leave him alive for a peaceful resolution after completing Yahar'gul, Unseen Village (Evening).
- Defeat the Blood-starved Beast to open up the Healing Church Workshop, acquire the Pthumeru Chalice and cause Kidnappers to appear in various areas. Allow a Kidnapper to kill you in order to access Yahar'gul, Unseen Village (Evening).
Regional materials
- Treasure pickups: Blood Stone Shard ×12; Ritual Blood (1) ×2. Wandering Nightmares: Blood Stone Shard ×9.
Enemies: stats and drops
| Enemy | HP · NG | Blood Echoes · NG | Drop & [Rate] |
|---|---|---|---|
| Beast Patient (Male) | 190 | 141 | Random gem based on area x1 [4%], Blood Vial x1 [8%] |
| Beast Patient (Female) | 225 | 155 | Random gem based on area x1 [8%], Blood Vial x1 [16%] |
| Ashen Blood Beast Patient | 242 | 254 | Random gem based on area x1 [8%], Blood Vial x2 [30%], Antidote x2 [10%] |
| Wandering Nightmare | 46 | 11 | Blood Stone Shard x3 |
| Carrion Crow | 121 | 64 | Pebble x1 [6%], Pebble x2 [3%], Antidote x2 [1%] |
| Scourge Beast | 364 | 987 | Blood Stone Shard x2 [8%], Blood Stone Shard x1 [87%], Beast Blood Pellet x1 [5%] |
| Djura's Ally | 997 | 795 | Bone Marrow Ash x6 [100%] |
Items · Item Treasures
| Item | Location |
|---|---|
| Tempering Blood Gemstone (1) | On the pathway that leads from Cathedral Ward to Old Yharnam, after you first go down the stairs beneath the stone coffin. It is on the corpse on the pile of statues. |
| Antidote x4 | On the pathway that leads from Cathedral Ward to Old Yharnam, as you reach the broken staircases. Instead of taking the ladder, drop down onto the stairs below and climb back up the broken steps. They are on a corpse at the top. |
| Pungent Blood Cocktail x3 | In the room with the Old Yharnam lamp, obscured by a pile of incense urns in the small side corridor. |
| Blood Stone Shard x1 | On the corpse hanging over the ledge opposite the bridge as you enter Rooftops. |
| Hunter's Torch | After dropping off the ledge opposite the bridge as you enter Rooftops, climb down the rubble to the small courtyard where two female Beast Patients are. It is on the corpse in the small covered area. |
| Coldblood Dew (2) x1 | After dropping off the ledge opposite the bridge as you enter Rooftops, drop all the way down to the bottom walkway, follow it past the door and climb the ladder to the tower. |
| Blood Vial x6 | When travelling Charred Remains from the Old Yharnam lamp, they are on the corpse near the burning Beast Patients to the left. |
| Coldblood Dew (2) x1 | After crossing the bridge past Charred Remains, go around the building to the left. It is guarded by a female Beast Patient. |
| Blood Stone Shard x2 | After crossing the bridge past Charred Remains, go around the building to the right. They are on the corpse in the alcove. |
| Blood Stone Shard x1 | The corpse on the balcony of the Crumbling Building. |
| Antidote x3 | The corpse in the alcove in the main room of Crumbling Building. |
| Antidote x3 | The corpse near the explosive urns on the path from Crumbling Building to Old Church. |
| Blood Stone Shard x2 | After crossing the makeshift bridge from Crumbling Building to Old Church, turn left instead of going inside. They are in the group of Carrion Crows. |
| Fire Paper x2 | After crossing the makeshift bridge from Crumbling Building to Old Church, turn right and follow the path around to a dead end. |
| Bloodtinge Gemstone (1) | In the residence adjacent to Old Church Courtyard, in the small chamber that the large female Beast Patient bursts out of. |
| Antidote x1 | In the residence adjacent to Old Church Coutyard, in the corner near the door to Old Church Courtyard. |
| Coldblood Dew (3) x1 | The corpse slumped against the large winged statue in Old Church Courtyard. |
| Blood Vial x6 | The Storage Area accessed by dropping down from Hunter's Plaza onto the ledge. They are on the corpse slumped against the pillar on the ground floor. |
| Tempering Blood Gemstone (1) | The Storage Area accessed by dropping down from Hunter's Plaza onto the ledge. In the treasure chest on the ground floor. |
| Rifle Spear | The Storage Area accessed by dropping down from Hunter's Plaza onto the ledge. It is on a corpse as you climb the staircase to the top floor. |
| Charred Hunter Set | The Storage Area accessed by dropping down from Hunter's Plaza onto the ledge. It is on the top floor on the corpse in the chair. |
| Charred Hunter Gloves | The Storage Area accessed by dropping down from Hunter's Plaza onto the ledge. It is on the top floor on the corpse in the chair. |
| Charred Hunter Trousers | The Storage Area accessed by dropping down from Hunter's Plaza onto the ledge. It is on the top floor on the corpse in the chair. |
| Coldblood Dew (2) x1 | The dead-end ledge at the base of the small staircase leading down from Hunter's Plaza, near a destroyed section of wall. |
| Madman's Knowledge x1 | The corpse hanging over the intersecting beams on the top of Ritual Hall Rafters. |
| Molotov Cocktail x4 | Cross Ritual Hall Rafters to the far side, then drop down onto the wooden platforms below. They are on a corpse near the window. |
| Bloody Messenger Head Bandage | Cross Ritual Hall Rafters to the far side, then do a running jump / roll onto the lower wooden platform parallel to the windows. It is on the corpse. |
| Coldblood Dew (2) x1 | A corpse on the wooden platforms parallel to the wall with no windows, below Ritual Hall Rafters and above Ritual Hall. Can be accessed either by taking the first door on the right from Ritual Hall Entrance, or by dropping onto it from Ritual Hall Rafters. |
| Antidote x3 | The corpse near the top of the first set of stairs leading down from Ritual Hall Entrance to Ritual Hall. |
| Blood Stone Shard x2 | After taking the first set of stairs down from Ritual Hall Entrance to Ritual Hall, take the door on the right instead of continuing down. They are on the corpse at the far end of the platform. |
| Madman's Knowledge x1 | In the Ritual Hall, on the corpse in an alcove on the side opposite the altar. |
| Ritual Blood (1) x2 | On the altar on the Ritual Hall. |
| Blood Stone Shard x2 | When leaving Ritual Hall for Ritual Hall Terrace, turn left and follow the path to the dead end with the group of Carrion Crows. |
| Blood Vial x6 | When leaving Ritual Hall for Ritual Hall Terrace, turn right. They are on the corpse on the pile of statues past the door to Smoke-filled Room. |
| Pungent Blood Cocktail x2 | When leaving Smoke-filled Room for Lower Parish Bridge, they are on the corpse laying against the wall in the corner to the left. |
| Blood Stone Shard x2 | When leaving Smoke-filled Room for Lower Parish Bridge, continue directly forward down the path leading to the huge gate. They are on a corpse against the wall. |
| Beast Blood Pellet x6 | At the intersection in Lower Parish Alley between Lower Parish Bridge and Lower Parish Tower, follow the pathway that runs perpendicular to Lower Parish Bridge. Continue and turn right at the end. They are on a corpse in an alcove. |
| Antidote x1 | The corpse in the entrance room of Lower Parish Tower. |
| Blood Stone Shard x2 | After climbing the first set of stairs in Lower Parish Tower, go out the door into the balcony area. They are on the corpse. |
| Fire Paper x2 | The corpse on the very top floor of Lower Parish Tower, past the exit door. |
| Quicksilver Bullets x10 | The corpse in the corner past the Scourge Beast and Ashen Blood Beast Patient as you approach The Church of the Good Chalice from Lower Parish. |
| Bold Hunter's Mark x2 | The corpse in the pile of statues on the small raised area at the top of the stairs leading to the Church of the Good Chalice. |
| Coldblood Dew (3) x1 | Among the burning Beast Patients, on the side of the path farthest from the river. |
| Coldblood Dew (3) x1 | Among the burning Beast Patients, on the side of the path closest to the river. |
| Antidote x3 | Behind the altar in the Church of the Good Chalice. |
Source : Bloodborne Wiki · CC BY-SA 3.0