Central Yharnam — Bloodborne
Central Yharnam — Exploration, Bloodborne. Explore the sourced guide, practical details and related entries. Free access.
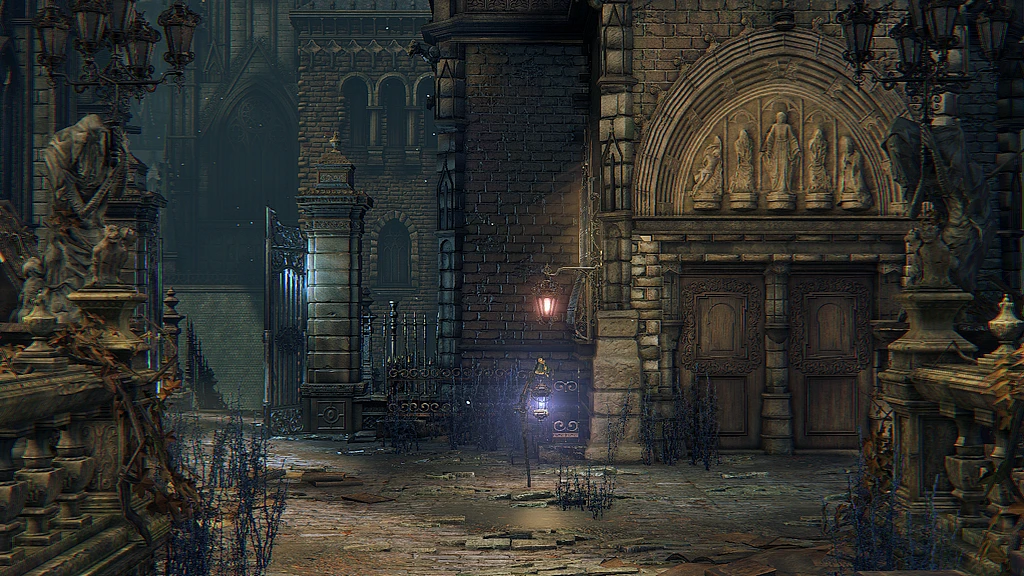
Finding your way around the region
Lamps and subareas:
- Central Yharnam
- Great Bridge
- Tomb of Oedon
Connected regions:
- Iosefka's Clinic
- Cathedral Ward
Prepare to explore
| Wiki recommendation | Value |
|---|---|
| Character level | 10 - 25 |
| Weapon upgrade level | +3 |
Key encounters
Boss : Cleric Beast · Father Gascoigne
Characters: Gilbert · Eileen the Crow · Young Girl and Older Sister · Lonely Old Woman
Insight : + 1 Encounter the Cleric Beast + 3 Defeat the Cleric Beast + 1 Encounter Father Gascoigne + 1 Witness Father Gascoigne 's transformation + 2 Defeat Father Gascoigne
Summons: locations and conditions
| Location | Condition |
|---|---|
| Old Hunter Father Gascoigne : Summoned by the fountain past the burning effigy the townsfolk gather around. (Note: This is now the ONLY place he can be summoned from, as they removed the location by the Central Yharnam lamp behind the shortcut door. He will use Silencing Blank if you enter the sewer. | This works before you initiate Father Gascoigne 's boss battle, but after you start the boss battle against him, he can no longer be summoned for this fight. |
| Old Hunter Alfred : Summoned by the Gilbert's House down the stairs shortcut from Central Yharnam lamp. | You must have spoken to Alfred and agreed to cooperate with him. If you shift time into the Night, Alfred moves to his new position outside the Forbidden Woods , his summon signs disappear and won't be available for the boss fight. |
Area Progression
- Pick up the Torch in the Plaza.
- Kill the Cleric Beast to acquire the Sword Hunter Badge and gain Insight to allow character leveling in the Hunter's Dream.
- Enter the Dry Docks to acquire the Saw Spear.
- Get the Saw Hunter Badge from the Boar Tunnel.
- Kill Father Gascoigne to acquire the Oedon Tomb Key so you can reach the Cathedral Ward.
- Open the chest at the end of the Chapel Path to get the Blood Gem Workshop Tool.
Regional materials
- Treasure Pickup : Bloodstone Shard: 10
Enemies: stats and drops
| Enemy | HP · NG | Blood Echoes · NG | Drop & [Rate] |
|---|---|---|---|
| Huntsman (Torch & Axe) | 150 | 48 | Blood Vial x1 [21%], Quicksilver Bullets x2 [10%], Molotov Cocktail x1 [5%] |
| Huntsman (Torch & Shield) | 70 | 48 | Blood Vial x1 [21%], Quicksilver Bullets x2 [10%], Molotov Cocktail x1 [5%] |
| Huntsman (Sickle) | 70 | 48 | Blood Vial x1 [8%] |
| Huntsman (Cleaver) | 70 | 48 | Blood Vial x1 [8%] |
| Huntsman (Cutlass) | 150 | 48 | Blood Vial x2 [32%] |
| Huntsman (Pitchfork) | 150 | 48 | Blood Vial x1 [8%] |
| Huntsman (Rifle) | 90 | 48 | Quicksilver Bullets x3 [100%] |
| Wheelchair Huntsman (Pistol) | 80 | 58 | Quicksilver Bullets x4 [100%] |
| Rabid Dog | 80 | 53 | None |
| Carrion Crow | 70 | 29 | Pebble x1 [6%], Pebble x2 [3%], Antidote x1 [1%] |
| Large Huntsman (Torch & Saw) | 225 | 73 | Blood Vial x2 [79%], Blood Stone Shard x1 [16%], Oil Urn x1 [5%] |
| Large Huntsman (Spear) | 282 | 73 | Blood Vial x2 [79%], Blood Stone Shard x1 [16%], Oil Urn x1 [5%] |
| Large Huntsman (Spear) · stronger variant | 358 | 257 | Blood Vial x2 [79%], Blood Stone Shard x1 [16%], Oil Urn x1 [5%] |
| Labyrinth Rat | 98 | 62 | Throwing Knife x2 [5%], Throwing Knife x1 [15%] |
| Rotted Corpse | 239 | 56 | Blood Vial x1 [20%], Bold Hunter's Mark x1 [2%] |
| Scourge Beast | 520 | 336 | Blood Vial x3 [92%], Blood Stone Shard x1 [8%] |
| Huntsman's Minion (Brick) | 279 | 158 | Blood Vial x4 [5%], Blood Vial x2 [85%], Shining Coins x3 [5%], Shining Coins x2 [5%] |
| Huntsman's Minion (Statue) | 279 | 158 | Blood Vial x4 [5%], Blood Vial x2 [85%], Shining Coins x3 [5%], Shining Coins x2 [5%] |
| Executioner | 343 | 340 | Random gem based on area x1 [20%], Blood Vial x4 [24%], Blood Vial x3 [52%], Pungent Blood Cocktail x1 [4%] |
| Maneater Boar | 423 | 431 | Blood Vial x4 [20%], Blood Vial x2 [80%] |
Items · Item Treasures
| Item | Location |
|---|---|
| Blood Vial x4 | Down the small set of steps opposite the Clinic's Courtyard Gate. |
| Blood Vial x2 | Next to the lever that activates the ladder leading to Gilbert's House. |
| Molotov Cocktail x6 | Near the two sleeping Huntsman across from the lever, obscured by a pile of destructible boxes. |
| Pebble x8 | On the way from Gilbert's House to the Overpass. |
| Molotov Cocktail x4 | Drop down through the gap in the railing on The Overpass facing the burning Beast Patient. Check in between the burning Beast Patient and the well. |
| Blood Stone Shard x1 | Go up the Wagon Stairs, then up the next set of stairs to a dead end. |
| Quicksilver Bullets x5 | Go up the Wagon Stairs and follow the path through to Hunter's Flame. They are in an alcove to the way to Silent Stairs. |
| Coldblood Dew (1) x1 | As you approach Hunter's Flame, take the first set of stairs on the left, before the Huntsman with the rifle. It is in the corner. |
| Blood Vial x2 | On the corpse slumped against the fence as you enter The Plaza from Main Street. |
| Blood Stone Shard x1 | Obscured by a pile of crates to the left of where you first enter The Plaza from Main Street. |
| Blood Vial x2 | At the rumbling gate behind Hunter's Flame. |
| Molotov Cocktail x4 | Near the Huntsman's Minion bashing on the gate in The Plaza. |
| Torch | Near the Huntsman's Minion bashing on the gate in The Plaza. |
| Oil Urn x2 | In the pile of coffins and boxes behind the fountain in The Plaza, surrounded by Carrion Crows. |
| Coldblood Dew (1) x1 | Near the small, non-interactible gate facing the Silent Stairs. |
| Blood Vial x6 | On the bench behind the well you pass by while traveling from The Plaza to The Great Bridge. |
| Blood Stone Shard x1 | When entering the Great Bridge from The Plaza, face away from the two Scourge Beasts and check the pile of ruined carriages blocking off the end. |
| Blood Stone Shard x1 | Behind the pile of destructible boxes in the dead end near Main Street Overlook. |
| Pebble x10 | The ledge at Main Street Overlook. |
| Blood Stone Shard x1 | Behind the pile of destructible boxes connecting Main Street Overlook to the Aqueduct. |
| Coldblood Dew (1) x1 | Top floor of Bridge Residence. |
| Pungent Blood Cocktail x2 | Bottom floor of Bridge Residence, in front of the cabinet with the note. |
| Coldblood Dew (1) x1 | In the pile of rubble on top of Crumbled Stairs. |
| Quicksilver Bullets x10 | A body on the Great Bridge, near where the Cleric Beast jumps down. |
| Blood Stone Shard x1 | The body slumped against the wall on the path between Bridge Residence and Gilbert's Gate. |
| Coldblood Dew (3) x1 | On the path from the Dog Kennels to Dry Dock, turn right just before Canal Bridge and check the small side path. |
| Coldblood Dew (1) x1 | Dry Dock - Rafters, against the wall opposite the path to Eileen. |
| Blood Stone Shard x2 | Cut down the hanging corpse in Dry Dock - Rafters, closest to Eileen's location. It will drop below to Dry Dock - Lower Floor and the item can be collected. |
| Saw Spear | Cut down the hanging corpse in Dry Dock - Rafters, farthest from Eileen's location. It will drop below to Dry Dock - Lower Floor and the item can be collected. |
| Coldblood Dew (1) x1 | Dry Dock - Upper Floor, behind the pillars on the side opposite the stairs leading down from Canal Bridge. |
| Madman's Knowledge x1 | The dead end in the Dry Dock - Lower Floor canal, behind the two Labyrinth Rats. |
| Coldblood Dew (1) x1 | The dead end in Canal Walkways, where the Large Huntsman patrols. |
| Oil Urn x2 | The path from Canal Walkways to The Canal, obscured behind some destructible coffins and a pair of Carrion Crows. |
| Blood Stone Shard x1 | As you approach The Canal from Canal Walkways, drop onto the final beam before the bridge. |
| Quicksilver Bullets x10 | The middle of the seven Rotted Corpses in The Canal. |
| Madman's Knowledge x1 | The dead end near Canal Residence, behind four Carrion Crows. |
| Hunter Set | Just before the long drop from Aqueduct to The Canal, near the Large Huntsman. |
| Thick Coldblood (5) x1 | As you approach The Canal from Aqueduct, drop on to the final rafter. |
| Blood Stone Shard x1 | After taking the stairs down from Canal Exit, go into the small alcove before Boar Tunnel. It is behind a Rotted Corpse. |
| Coldblood Dew (2) x1 | Boar Tunnel, near the Maneater Boar. |
| Saw Hunter Badge | Boar Tunnel, near the Maneater Boar. |
| Bold Hunter's Mark x2 | On the statue with two Large Huntsmen facing it, just prior to Tomb of Oedon. |
| Red Jeweled Brooch | The body on a mausoleum roof in Tomb of Oedon, reached by dropping down from the pathway at the top of the stairs. |
| Blood Gem Workshop Tool | The treasure chest by the spiral staircase leading to Oedon Chapel. |
Source : Bloodborne Wiki · CC BY-SA 3.0